<br>
[Return to sensors page](../Sensors.html)
###Capacitance using the Arduino Capacitive Sensing Library.
This capacitance method, based on Arduino Capacitive Sensing library, can be used with most boards that support the Arduino IDE.
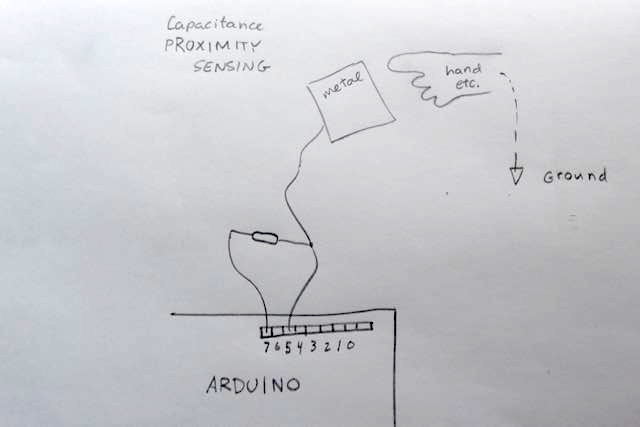
This is the configuration used for capacitance sensing with the Arduino. The pin on the left (7 in this example)
is used to charge the plate, through the resistor. The pin on the right (5 in this example) senses the change in voltage as the plate charges up.
The closer the grounded object is to the plate, the larger the capacitance, and the longer it takes to charge. The
time for charging (in arbitrary units) is the number that is reported by the sensing function.
<b>To use this sensor, load the latest version of the Capacitive Sensing Library. </b> Go to Sketch -> Include Library -> Manage Libraries. Search for "capacitive". Install the library "CapacitiveSensor" , latest version.
Your pin choice may vary, and you may use more than one sense pin for a single charging pin.
<b>[The Documentation on the Arduino Reference is here](http://playground.arduino.cc/Main/CapacitiveSensor?from=Main.CapSense)</b>.
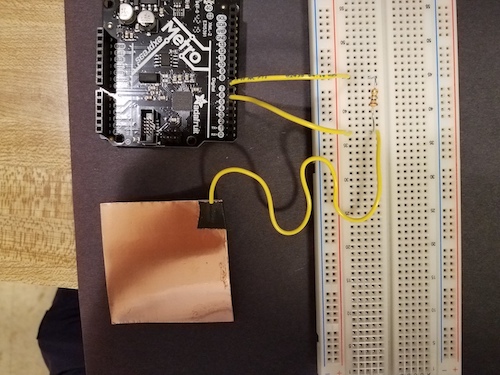
<b>[Here is the sample code for Capactive Sensing](./CapacitiveTouch.txt)</b> that works for the configuration shown above. The resistor R is usually 1 to 10 Mega-ohm. The larger
resistance makes the sensor more sensitive. Change the pin numbers to reflect your board.
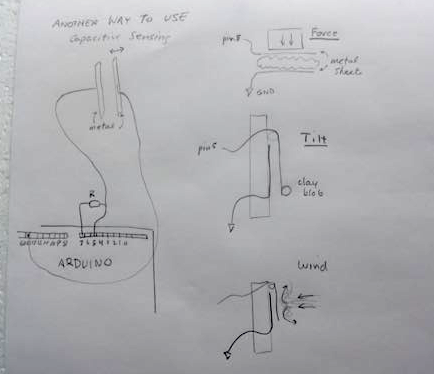
As shown above, the capacitive sensor can be used to measure position, force, tilt, airspeed, and more. In some cases, the other configuration for capacitance sensing, [the transmit-receive method,](./../tx_rx_sensors/index.html) gives better results. We're not sure why or in what cases one works better than another. Try both and document your results!
<b> If Cap library does not work. </b>
[Bare bones code for cases when you want to write your own function, or Arduino library does not work.](./Step_response.txt)