<br>
##Stepper motors. [(Adafruit link.)](https://learn.adafruit.com/all-about-stepper-motors/types-of-steppers)
[Drawing machine with two steppers, July 2020.](https://youtu.be/JjpYPcKUUpI)
[MIT Machine class page on steppers](http://fab.cba.mit.edu/classes/865.18/motion/steppers/index.html)
[Bipolar step sequence.](https://motion.schneider-electric.com/technology-blog/stepper-motor-basics-stable-shaft-positions/)
###Bipolar Stepper motors.
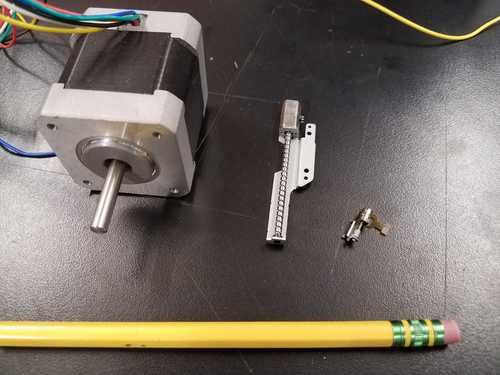
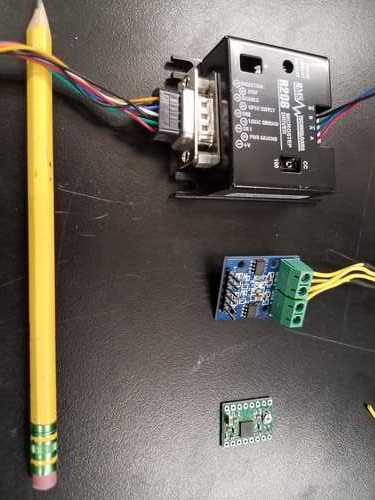
Above are three stepper motors. They run with four leads, and can be driven bi-directionally with two [h-bridges](./../h_bridge/index.html)
, stepper motor control
chips or stepper motor control modules. Some of these drivers are shown above.
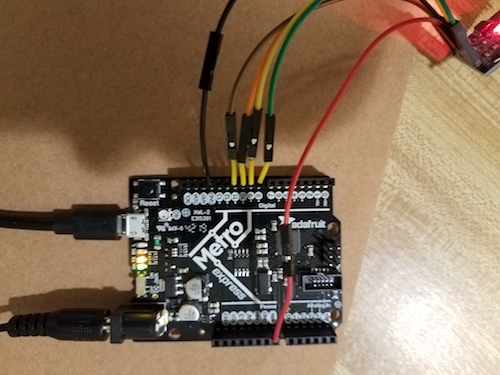
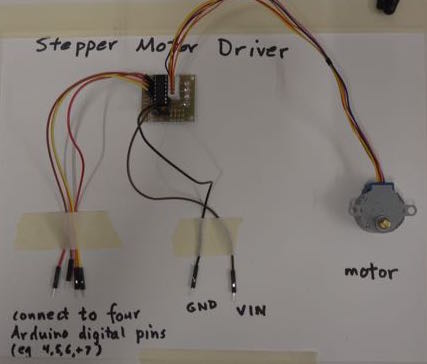
Here is a method for running a bipolar stepper from the double-h-bridge modules that we have. On the left, the Arduino, with motor
leads on pins 8,9,10, and 11 (green, yellow, orange, brown). Note that short yellow solid-core wires are used to connect female pins to sockets on the colored wires. The board is plugged into a 9V power supply (lower left side of board.) The red wire is plugged
into Vin, which sends the 9V directly to the motor driver module. If you need more than ~1A, you'll need to connect
the power supply directly to the motor driver module, not through the Vin pin. In that case, power the Arduino
separately. Black wire goes to ground.
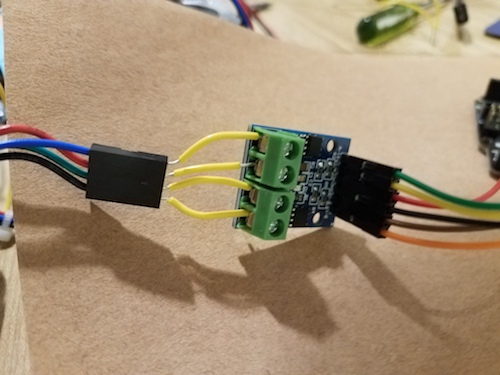
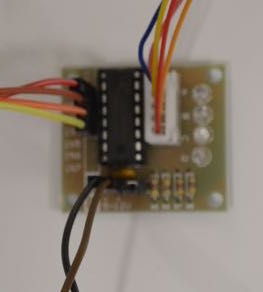
The same six wires plug into the module as shown in the right hand picture: Red and black in the middle and the four leads
from the digital out pins go to the two sides.
On the output side of the module the green/black and blue/red wires from the stepper are plugged into the two outputs, using the solid-core short yellow wires.
###Programs for Bipolar stepper motors.
[Here is the example program](../h_bridge/itsy_stepper_library_example.txt) downloaded from the Arduino IDE examples, for driving a stepper motor. It uses the Stepper library, which should be a part of the Arduino IDE already. If it is not, use the Library Manager under Sketch>Include Library to install it.
This program steps only two steps per second in one direction. How can you modify the program to:
- Move faster?
- Move backward?
- Move a certain number of steps and then stop?
Check the [Arduino Stepper Library documentation](https://www.arduino.cc/en/reference/stepper) for details on using the stepper functions. In particular, see the setSpeed(rpm) function.
[Here is an alternative approach](../h_bridge/stepper_no_library.txt) that uses a function in the code rather than a library function. You can add functions to this code to fully control a stepper motor at any speed in both directions.
###Unipolar stepper motors.
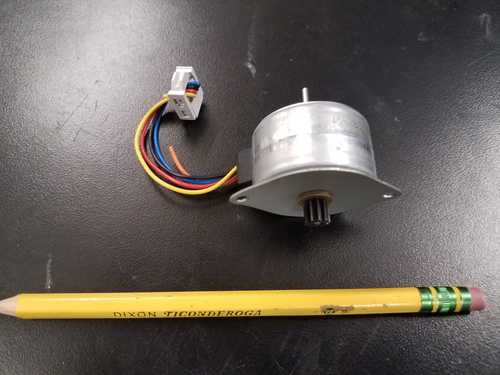
Above is a unipolar stepper (geared) with a driver module. "Unipolar" means that each coil of the motor receives
current only in one direction, unlike the bipolar steppers discussed above.
We have a few [modules](https://www.amazon.com/gp/product/B01CP18J4A/ref=oh_aui_detailpage_o00_s00?ie=UTF8&psc=1)
consisting of four FETs, which can drive these motors or other unipolar stepper motors
(or any four devices requiring current in one direction). In the picture, the four signal leads,
attached to four digital pins of the microcontroller,
come in to the board in the upper left. The power and ground connections are attached on the lower side, and the
motor is connected through the connector in the middle of the board.
[Arduino code to run a unipolar stepper in one direction.](./Unipolar_driver.ino)