<br>
[Return to Electronics Main Page](./../../../index.html)
### Breakout board witH ATSMD11 microcontroller.
Designed by Ben Brown.
We ordered 100 boards to breakout the pins of the ATSAMD11C14 for breadboarding.
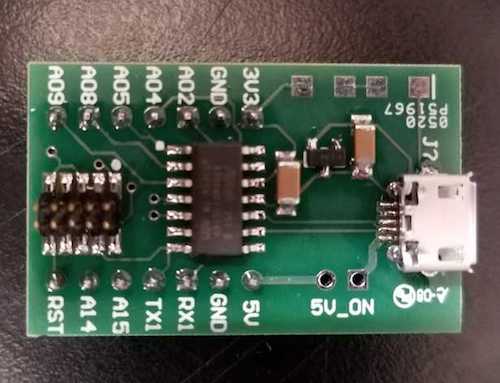
Here is the board.
###Arduino IDE support for this board.
For more complete information, see the Mattair Github page [here](https://github.com/mattairtech/ArduinoCore-samd)
- Make sure that you have the most recent Arduino version.
- In the Arduino IDE, click File->Preferences.
- Click the button next to Additional Boards Manager URLs.
- Add https://www.mattairtech.com/software/arduino/package_MattairTech_index.json.
- Save preferences, then open the Boards Manager.
- Install the Arduino SAMD Boards package. Use version 1.6.2 or higher.
- Install the MattairTech SAM D|L|C Core for Arduino package.
- Close Boards Manager, then click Tools->Board->(choose board).
- Select the MCU with the now visible Tools->Microcontroller menu (if present).
You should now be able to program this board in the Arduino IDE (upgrade if needed.)
- The board appears in the list of boards under MattairTech SAM boards as a "Generic D11C14A".
- Under "Tools>Ports" you should find it as a "MattairTech Xeno Mini".
- Under Tools>Serial configuration, you should make sure that "ONE_UART_NO_WIRE_ONE_SPI" is chosen.
- Program loading can take several seconds. Do not despair too early.
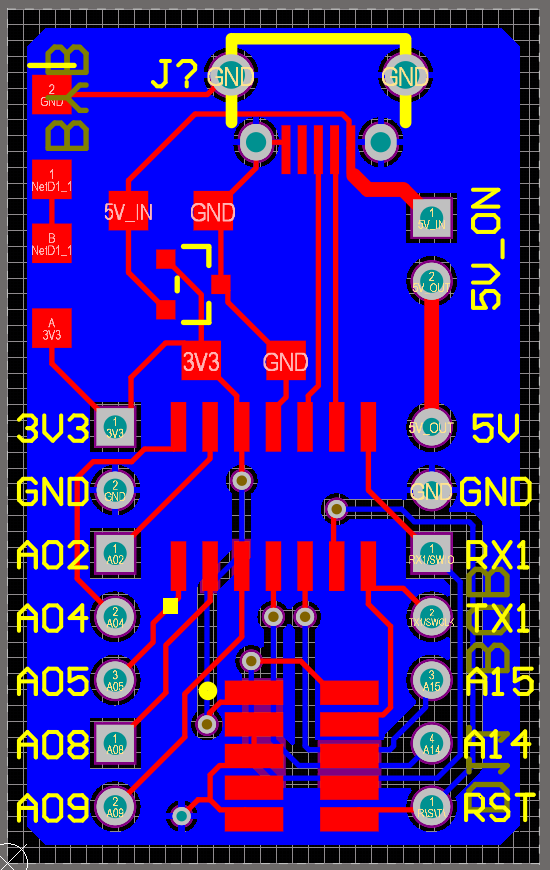
###Pin diagram for ATSAMD11 chip.
Note the names in Arduino IDE are given in the columns nearest the chip: Referring to the picture above, starting with A02, they should be called "2,4,5,8,9, not used, 14,15,30,31" Note that TX1=30 and RX1=31.
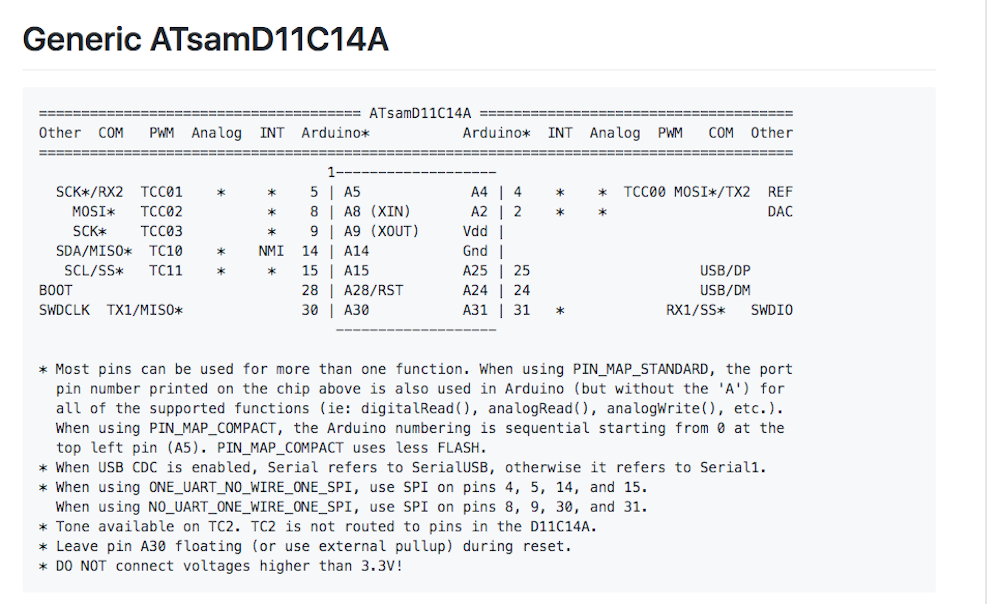
Diagram of pin functions and notes about the Mattair Arduino core.
###Loading the bootloader
(Students who have been given the board will not have to do this, we hope.)
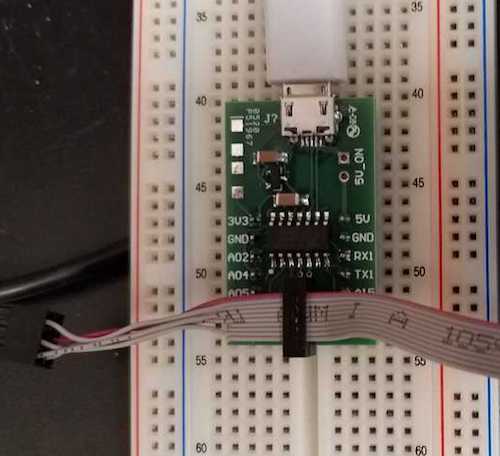
This is how you program it using the ATMEL ICE programmer and the 10-pin header. Note the orientation of the cable.
1. Install Open OCD.
2. Download and unzip [this directory]().
3. In a command window, navigate to the directory.
4. Attach the ATMEL ICE programer as in the picture.
5. Type "openocd".
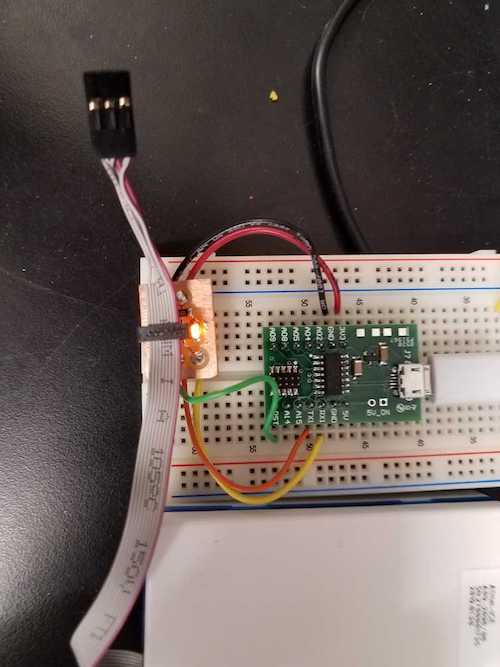
This is an alternative way to program, not using the header.
Here's a diagram of the layout.
###May 2020
Reloaded bootloader in two ATSAMS according to Eric's instructions on newly installed Linux computer. For one board just needed to reload bootloader. For the other, I replaced the SAM chip.