<br>
##Resources
- [Electronics symbols, and simple circuits.](https://roberthart56.github.io/SCFAB/SC_lab/Electronics/electronics_basics/electronic_basics.html)
- Tinkercad
- [Get an Autodesk (free) student account.](https://www.autodesk.com/education/home)
- [Tinkercad website.](https://www.tinkercad.com/)
- [Spring 2020 digital fabrication course.](https://nathanmelenbrink.github.io/ps70/index.html)
- Connecting to wireless internet with the ESP32- based modules:
- [Link to workshop on networking.](https://nathanmelenbrink.github.io/intro-dig-fab/09_networking/index.html)
- [Video of two wireless-connected boards trading data through a firebase (google) database.](https://youtu.be/wH-XIe2DcAI)
- [Link to Elegoo "Super Starter Kit Uno R3" documentation.](http://www.elegoo.com/download/)
###Arduino and Electronics Intro, Sept. 16, 2020
- Arduino IDE installation. [Download Arduino IDE](https://www.arduino.cc/en/Main/Software)
- [Link to Elegoo "Super Starter Kit Uno R3" documentation.](http://www.elegoo.com/download/)
- Blink program, using built-in LED. File - Examples - Basics - Blink.
- Modifying the Blink program. [modified_blink.txt](modified_blink.txt)
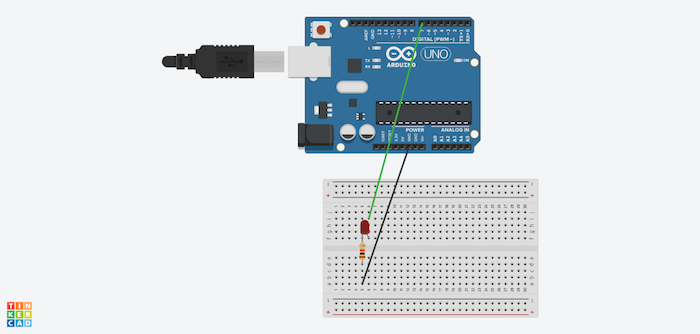
- Tinkercad and Arduino kit: Building a Blink circuit with an LED on a breadboard.
- [Get an Autodesk (free) student account.](https://www.autodesk.com/education/home)
- [Tinkercad website.](https://www.tinkercad.com/)
- Build an LED circuit with Tinkercad. [Tinkercad model - basic LED](https://www.tinkercad.com/things/4pTc6iwl5Ln-basic-blink/editel?sharecode=8bMG6r5M0lgXvdfhJmnGem79JFd-dZuXKYaqNrtmt4U)
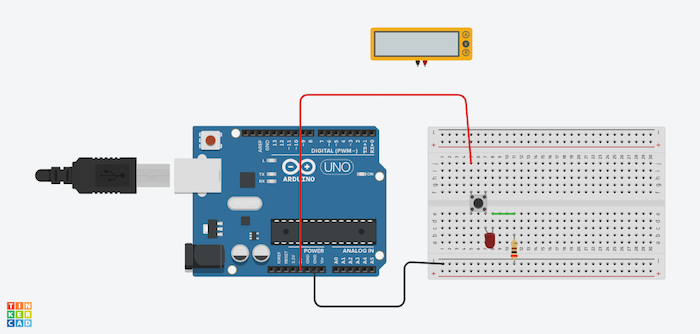
- Building a circuit with a button. Just 5V, LED, resistor, Ground. [Tinkercad link](https://www.tinkercad.com/things/8OAZxBUeQuz-simple-button-circuit/editel?sharecode=GnYxLkCRCMZKfiVihr_Ssje-0KfzNF95Z6Yykne1udU)
- Buttons as digital inputs: [link to diagrams](https://roberthart56.github.io/SCFAB/SC_lab/Sensors/Button/index.html)
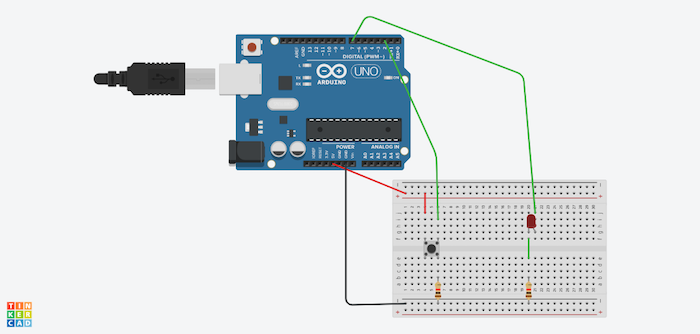
- Button program. File->examples->basics->DigitalReadSerial. [tinkercad model](https://www.tinkercad.com/things/3j3y2M0mkkE-button-push-program/editel?sharecode=16BdxWj1eMP1CRvO-1CRh9xb3E0WFBea5Ob5lBy9bY0)

- Button turns on LED using a program. [Here's the code](button_led.txt). And here's the[Tinkercad link to button-LED-program](https://www.tinkercad.com/things/1KPYci5MJoW-magnificent-habbi/editel?sharecode=gLV6nSrobmEh7TEJnpSkMrirzaDfa2ulXQsJ22JmF-A)
###Sensors Demonstration, Sept. 23, 2020
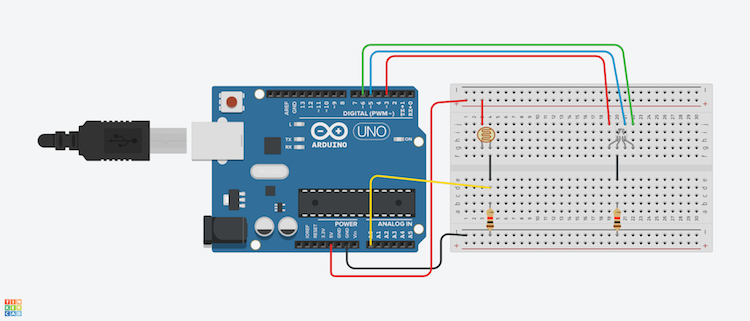
- Reading a photoresistor to detect light level. Demonstrate using [Tinkercad model.](https://www.tinkercad.com/things/eXd5onQdm0l-grand-turing/editel?sharecode=oTcPR817Hlrv6wQOmqi6mXQFxVYzVVlL4R0RFx7Mp7Q)
For code, use Arduino sample code for analog Read: "Files->examples->basics->analogRead Serial.""
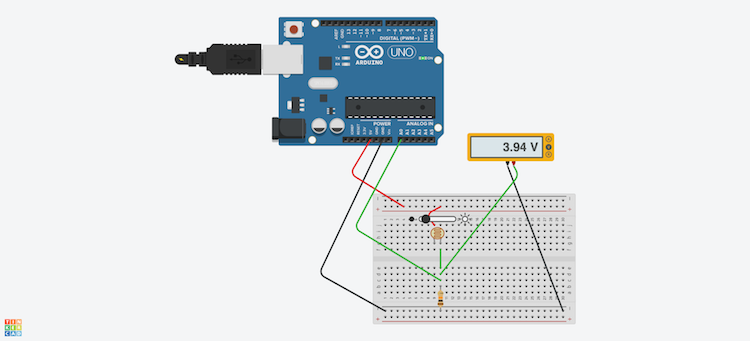
- Photoresistor circuit is shown above.
- "Analog in" on arduino gives numbers from 0 to 1023.
- Serial monitor is used to keep track of changing variables.
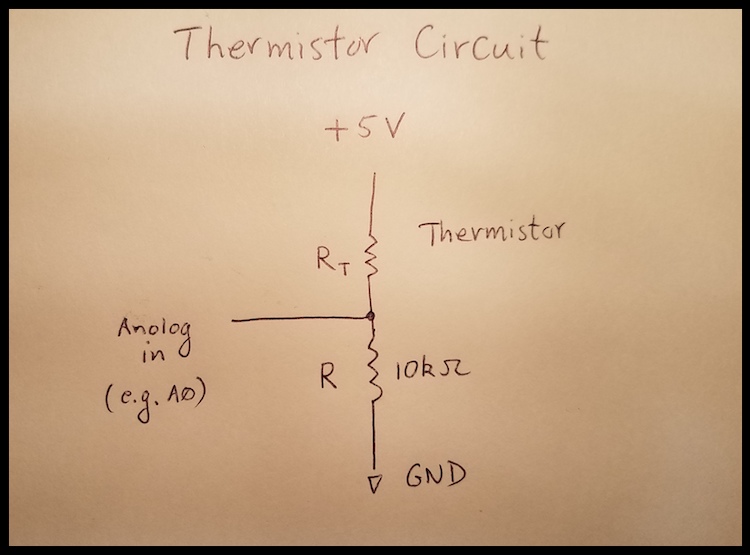
- Temperature sensing using a thermistor.
- Link to [lab page on thermistor.](https://roberthart56.github.io/SCFAB/SC_lab/Sensors/Thermistor/index.html)
- [Arduino code for this configuration](thermistor_9_23_20.txt)
- Photo of circuit.

- Realtime demo.
###Demonstrations for Sept. 30, 2020.
- Photoresistor with RGB LED.
- [Tinkercad.](https://www.tinkercad.com/things/gYY83C3kJES-bodacious-bruticus-allis/editel?sharecode=LavgIpk3OLauciMlIjNoY-fToRwqxuWjsJn9hK-5u-U)
- [Arduino Code.](RBG_LED.txt)
- 
- Servomotor.
- [Tinkercad circuit.](https://www.tinkercad.com/things/0qaKWHsJjDh-tremendous-tumelo-kieran/editel?sharecode=13WcM8MP3l6pTYZyV5uclordMVU8fuKx3-8b6milmK8)
- 
###Demonstration for Oct. 7, 2020.
- Connecting to wireless internet with the ESP32- based modules using [firebase:](https://firebase.google.com/)
- [Link to workshop on networking.](https://nathanmelenbrink.github.io/intro-dig-fab/09_networking/index.html)
- [Video of two wireless-connected boards trading data through a firebase (google) database.](https://youtu.be/wH-XIe2DcAI)
- [Arduino code for sender](firebase_pot_Sept9.txt)
- [Arduino code for receiver](firebase_servo_Sept9.txt)
- Realtime demonstration of database and connections.
- Purchasing Esp32 modules
- [Amazon](https://www.amazon.com/ESP-WROOM-32-Development-Dual-Mode-Microcontroller-Integrated/dp/B07WCG1PLV/ref=sr_1_14?dchild=1&keywords=wroom&qid=1602020892&sr=8-14)
- [Other](https://makeradvisor.com/tools/esp32-dev-board-wi-fi-bluetooth/)
- [Tutorials on ESP32](https://randomnerdtutorials.com/getting-started-with-esp32/)
###Unipolar stepper motor. Oct. 21, 2020.
Here's the stepper motor board that comes in the Elegoo kit, with the motor itself behind. This motor takes 2000 steps for one revolution.

Below is a photo of the connections to the Arduino. The connections on the stepper board and the Arduino are listed:
- orange - in1 - Pin 8
- yellow - in2 - pin 9
- green - in3 - pin 10
- blue - in4 - pin 11
- red - power plus - VIN or 5V. (with 9V battery as in the picture, VIN = 9 Volts)
- brown - power minus - ground

Here is a link to a simple code that steps continuously. [Unipolar_stepper.txt](Unipolar_stepper.txt)
Here is a code that uses a function to step, and steps forward and backwards. [step_in_loop.txt](step_in_loop.txt)
Here is a code that uses tabs to make functions clearer, and does a small dance. [unipolar_Oct21a.zip](unipolar_Oct21a.zip)
###Touch sensors. Oct 21, 2020.
[link to page on touch sensing with Arduino](https://roberthart56.github.io/SCFAB/SC_lab/Sensors/CapacitiveTouch/index.html)
###Combining code.
The linked code is what we tried to do in class: move a motor an amnount depending on a sensor reading, only if the sensor reads greater than a programed value: [touch-stepper.zip](touch-stepper.zip)
### DC Motors and driving them. Oct. 28, 2020.
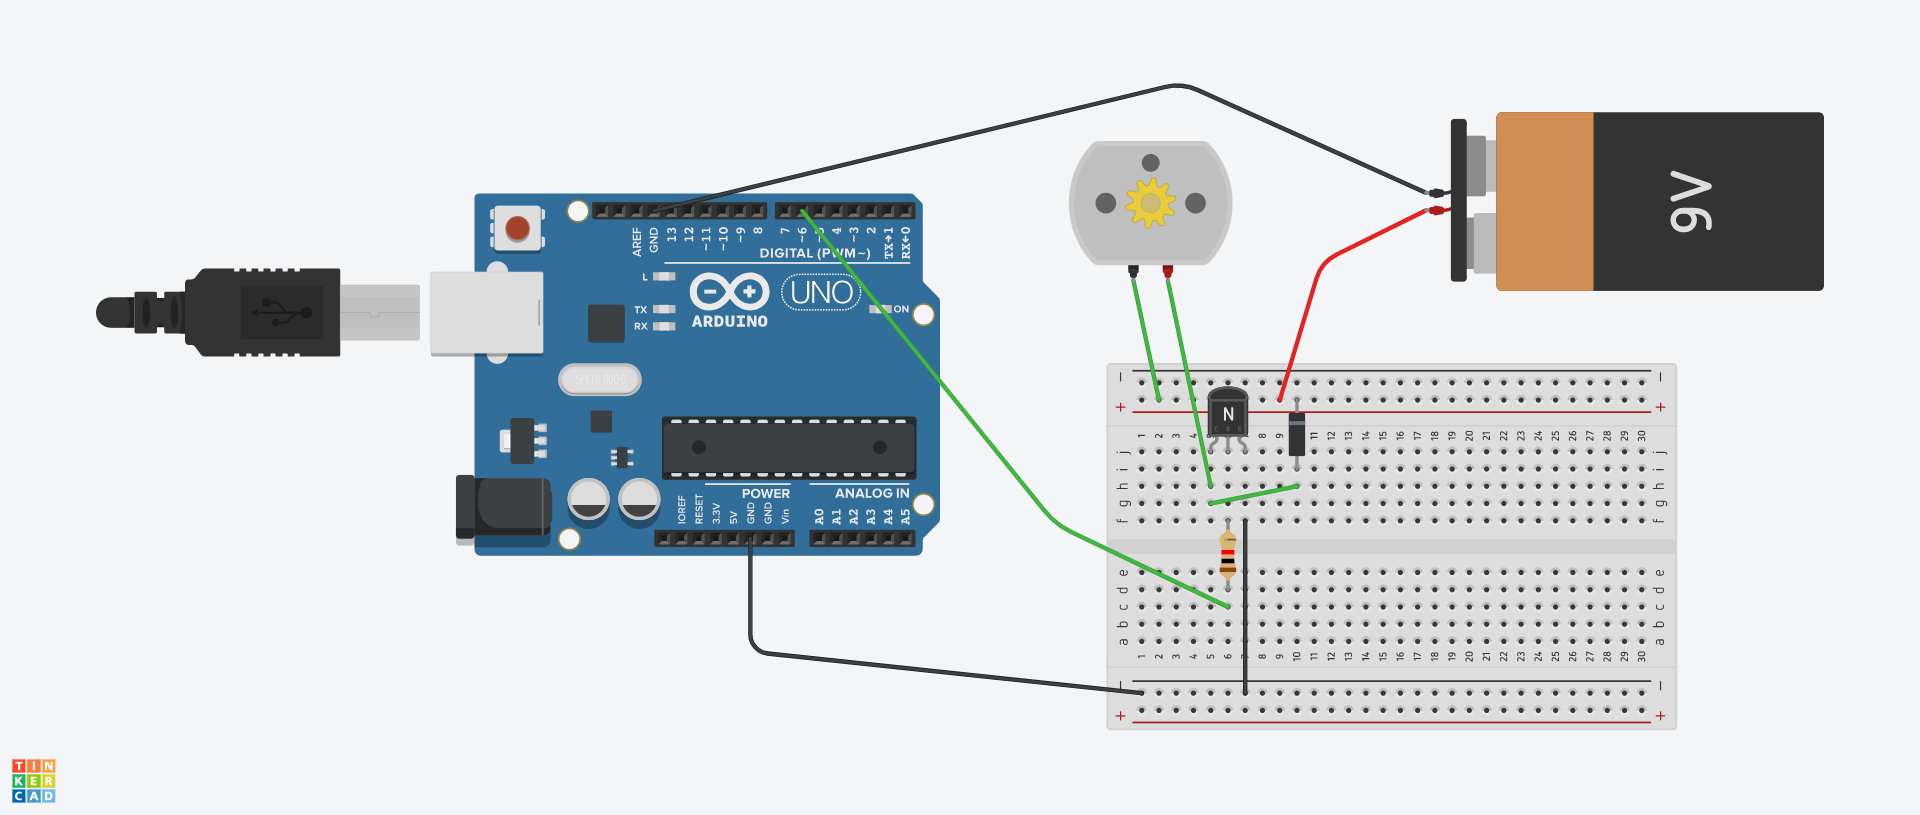
Here's what we'll demonstrate in class:
- motor and battery
- using a transistor to turn a motor on and off.
- Arduino code for on and off. Uses digitalWrite().
- Arduino code for varying speed by Pulse Width Modulation (PWM), using analogWrite().
- Arduino code for touch-controlled speed.
Transistor 2n2222 [datasheet](https://circuits-diy.com/2n2222-npn-transistor-datasheet/).
[link to Tinkercad](https://www.tinkercad.com/things/bziQv6UdJry-amazing-jaban/editel?sharecode=XJr9EXHZGiSMJAr8qAye7KZTF-jFCGM0NgS_DxJT4dM)
[Tutorial](https://learn.sparkfun.com/tutorials/transistors/applications-i-switches) from Sparkfun for using a transistor to drive a motor.
Arduino code to ramp motor speeds. [motor_drive.txt](motor_drive.txt)
Arduino code to control motor speed by touch. [touch_motor.txt](touch_motor.txt).